- 0xdurakiSimple app using React Native
This note describes the groundwork with some React Native basics. This will come handy if you ever need to Debug React Native apps. This tutorial assumes you are working on latest macOS with necessary Android toolchain installed (ie. Genymotion, or Android Studio).
React Native for Mobile Development
Without going into much detail about React Native itself, as any reverse engineering effor, we must first understand the engineering behind it. Lets start with some basics and pre-requisits as described below.
Developers Environment
To get a feel of the developer workflow, below is few requirements to setup the dev. environment on your macOS.
- Install React Native NPM package globally:
$ npm install --global react-native
- Initialize a new project via CLI
$ cd ~/dev/
$ npx @react-native-community/cli init rnprojectdemo
# Need to install the following packages:
# @react-native-community/cli@15.1.3
# Ok to proceed? (y) y
#                          ★
#              Welcome to React Native 0.77.0!
#                 Learn once, write anywhere
# ✔ Downloading template
# ✔ Copying template
# ✔ Processing template
# ✔ Installing dependencies
# ✔ Do you want to install CocoaPods now? Only needed if you run your project in Xcode directly … no
# ✔ Initializing Git repository
# ...
#
#   Run instructions for Android:
#       • Have an Android emulator running (quickest way to get started), or a device connected.
#       • cd "/Users/$USER/dev/rnprojectdemo" && npx react-native run-android
#
#   Run instructions for iOS:
#       • cd "/Users/$USER/dev/rnprojectdemo/ios"
#       • Install Cocoapods
#       • bundle install # you need to run this only once in your project.
- Write some app. code
Open the project in your favorite code editor.
(rnprojectdemo ~master) $ code . # Open project in VSCode
For example, I’ve removed the <Header/> tag from the App() function, and instead placed custom <Section> instead, with a <Text> view inside it:
// App.tsx

// ...
function App(): React.JSX.Element {
  // ...

  return (
    // <SafeAreaView ...>
    //   <StatusBar .../>
    //      <ScrollView ...>
                <Section title="ReactNative - Project Demo">
                    <View style={{marginTop: 0, marginBottom: 0, padding: 0}}>
                        <Text style={styles.sectionCaption}>
                        Welcome to Debugging React Native Apps.
                        </Text>
                    </View>
                </Section>
    // ...
I’ve also added custom sectionCaption style in App.tsx file, for the newly added <Text> view. This style provides custom paddings, margins and colors. The visibility is also reduced, a la transparency effect using opacity selector.
// App.tsx

function App(): React.JSX.Element {
    // ...
}

const styles = StyleSheet.create({
    // sectionContainer: { ... },
    // sectionTitle: { ... },
    // ...
    sectionCaption: {
        fontSize: 12,
        paddingBottom: 5,
        marginBottom: 5,
        marginTop: 0,
        paddingTop: 0,
        color: 'rgb(44, 43, 43)',
        opacity: 0.7,
    },
});
- Start a local dev server
Now that we have custom view in our app, we can start a local dev-server running on port 8081, to interact with the running app, or package and serve the bundle.
(rnprojectdemo ~master) $ npm i --dev @react-native-community/cli # install react-native CLI as devpkg
(rnprojectdemo ~master) $ npm install       # install required npm dependencies
(rnprojectdemo ~master) $ npm run start     # executes 'react-native start' which starts the dev-server
In another Terminal, we need to build, install & run the app on a connected device or emulator. If your device is connected, just make sure to enable “Developer Mode” and you are good to go. Emulators works just as fine, as this note is based on Genymotion running Nexus 10 in emulated mode.
(rnprojectdemo ~master) $ npm run android   # build and run the app on Android device/emulator

    # alternatively, you can also
(rnprojectdemo ~master) $ cd android/
(rnprojectdemo/android/ ~master) $ ./gradelw assembleDebug
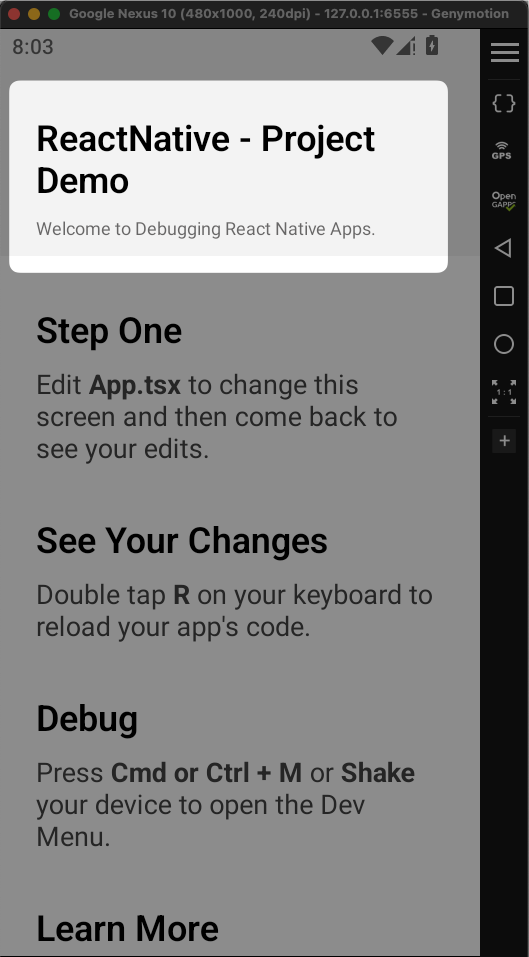
With that, we should see our app running, as shown below:
 Emulator - Running React Native Android App.
- Build, sign and release
Now that we have our sample demo app. running on emulator and working as it should, we can build & sign a release, resulting in a Google PlayStore ready version.
Edit the package.json file and add the build command in the scripts JSON-Key, like this:
// package.json

{
    "name": "rnprojectdemo",
    "scripts": {
        "build": "react-native run-android --mode=release",
        // ...
    }
    // ...
}
Now from the Terminal, use npm run build to build Android release version of the app:
(rnprojectdemo ~master) $ npm run build
# > rnprojectdemo@0.0.1 build
# > react-native run-android --mode=release
# ...
# info A dev server is already running for this project on port 8081.
# info Installing the app...
Both commands, npm run android, and now npm run build included a build step (gradle task) that packages all the Javascript code into a single file named "bundle". This bundle file is then placed inside the APK at /assets/index.android.bundle. For release variants, the bundle is also minified and (optionally) stripped from any log statements.
While we are in packages.json, we may also add the following commands (react-native, log-android):
{
    // ...
    "scripts": {
        "react-native": "react-native",
        "log-android": "react-native log-android",
        "build": "react-native run-android --mode=release",
        // "android": "...",
        // "ios": "...",
        // ...
    }
}
The reason why we are adding react-native command is due to the way we initialized our React Native app (ie. using npx @react-native-community/cli init), therefore using react-native from the Terminal won’t work. Instead, in we will use:
$ npm run react-native

# > rnprojectdemo@0.0.1 react-native
# > react-native
#
# Usage: react-native [command] [options]
#
# Options:
#   -v --version                  Output the current version
#   -h, --help                    display help for command
#
# Commands:
#   config [options]              Print CLI configuration
#   clean [options]               Cleans your project by removing React Native related caches and modules.
#   info [options]                Get relevant version info about OS, toolchain and libraries
#   bundle [options]              Build the bundle for the provided JavaScript entry file.
#   start [options]               Start the React Native development server.
#   codegen [options]
#   log-ios [options]             starts iOS device syslog tail
#   run-ios [options]             builds your app and starts it on iOS simulator
#   build-ios [options]           builds your app for iOS platform
#   log-android [options]         starts logkitty
#   run-android [options]         builds your app and starts it on a connected Android emulator or device
#   build-android [options]       builds your app
#   init [options] [projectName]  New app will be initialized in the directory of the same name. Android and iOS projects will use
#                                 this name for publishing setup.
#   doctor [options]              Diagnose and fix common Node.js, iOS, Android & React Native issues.
#   help [command]                display help for command
That way, we can also add additional flags when needed on the react-native CLI:
$ npm run react-native clean [options]
- Performing Bundle only
If you want to perform the bundling step only and build the JS code into bundle files, or if you want to insert React Native functionality to existing apps, just create the bundle from the Javascript files and required modules using:
(rnprojectdemo ~master) $ npm run react-native bundle
App Debugging
When running debug builds, there’s React Native “Developer Menu”, which appears when either:
- By shaking the device
- Using
CMD+Shift+Mkeyboard shortcut (inside Emulator) - Sending the special keyevent using adb:
adb shell input keyevent 82
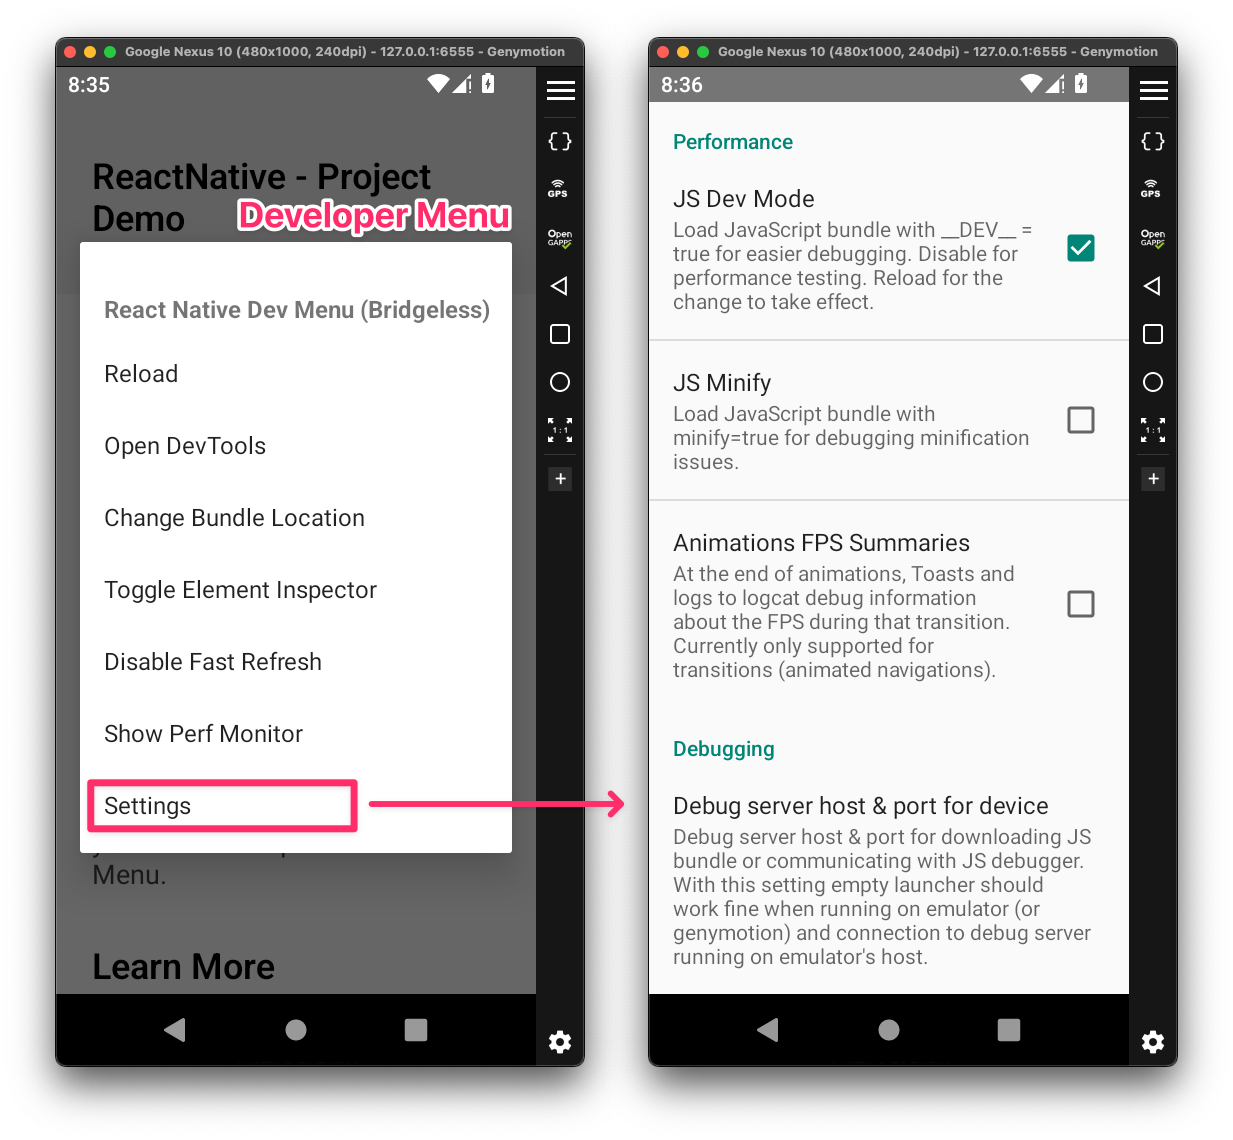
Clicking the “Settings” option in this menu shows another screen, allowing the various debugging configurations to be set.
 Emulator - React Native Dev Menu
From the Developer Menu, clicking “Open DevTools” will trigger one of the following tools on the development side to facilitate whole debugging interface. Under the hood, this changes the execution context of the JS bundle from the device’s JavaScriptCore engine to the Chrome’s debuggerWorker thread, powered by V8 engine.
To start the React Native Integrated Debugger via Chrome DevTools follow these steps:
- Open the “Developer Menu” (ie. shake the device, or send
82key event via adb) - Click on the “Open DevTools” button in the developers menu
- The Chrome DevTools should open automatically, if not open
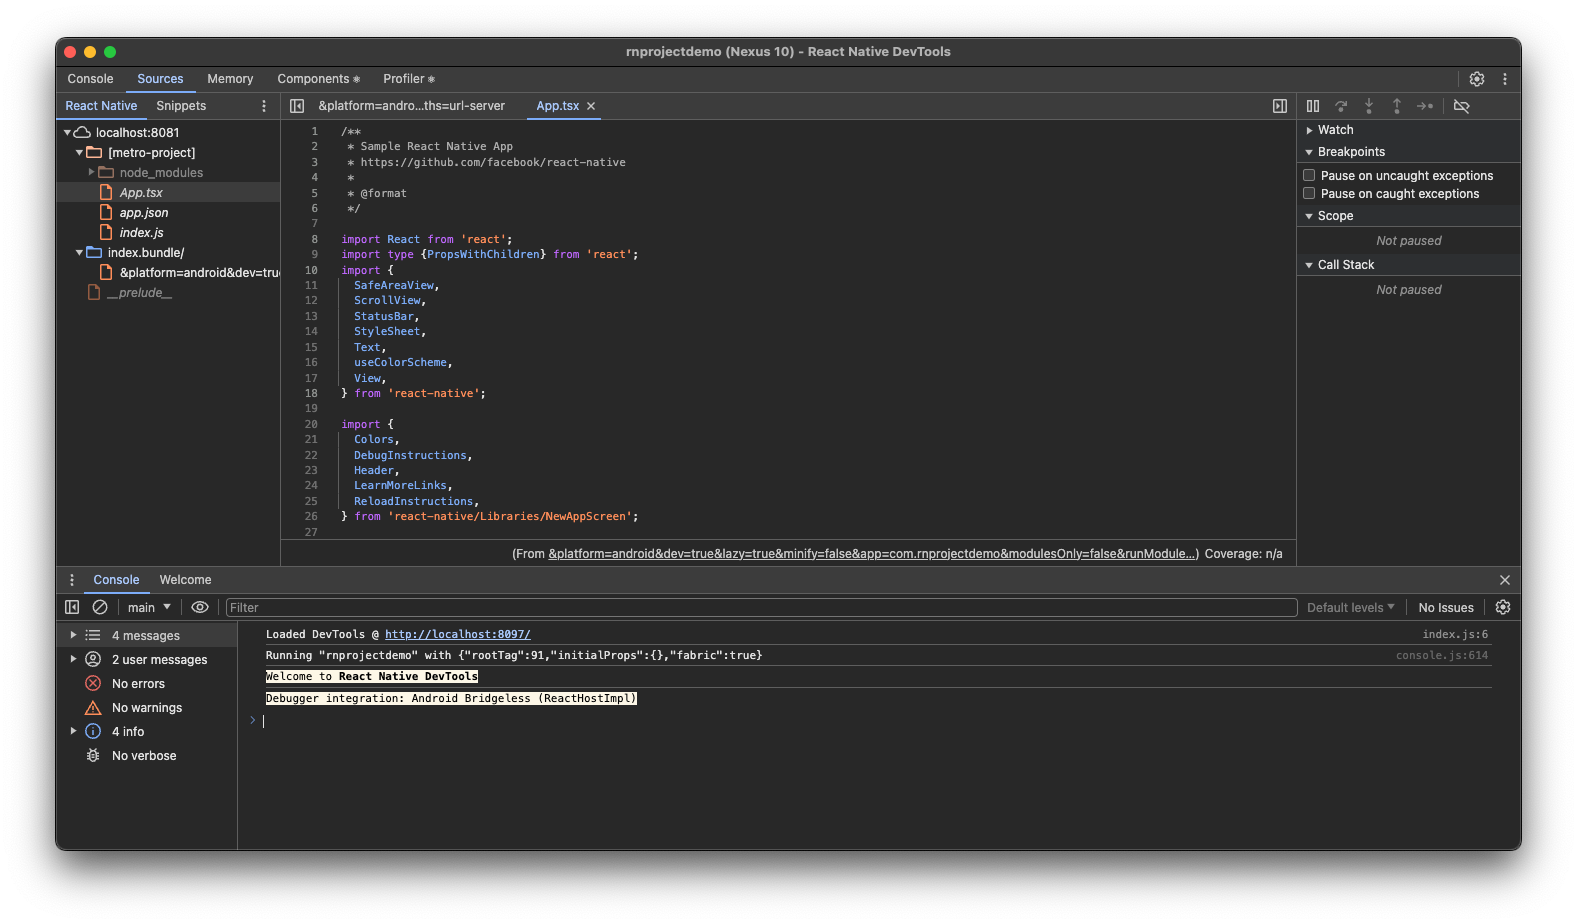
localhost:8081/debugger-uiin Chrome New Tab - Explore the DevTools as usual, view Console logs and explore code via Sources tab, as if debugging a web app
 DevTools - React Native Debugging
Another way is to use react-devtools Electron app, allowing you to run introspection on React components. The latest React Native’s integrated debugger should already support this, but if not:
$ npm install --global react-devtools   # install standalone 'react-devtools' app
$ react-devtools                        # start the standalone react-devtools debugger
Also load the Javascript supporting the react-devtools standalone app as shown on the startup screen. The easiest way to do so is to load necessary react-devtools script in index.js file at the very top:
/**
 * @format
 */
<script src="http://localhost:8097"></script>;
console.info('Loaded DevTools @ http://localhost:8097/');

// import {AppRegistry} from 'react-native';
// ...
App Logging
In terms of Logging app. messages or logs sent from the JS code (ie. via console.log), dumped by default in logcat (if not stripped during packaging), we can use npm run log-android command we added previously in package.json:
(rnprojectdemo ~master) $ npm run log-android
# > rnprojectdemo@0.0.1 log-android
# > react-native log-android
# info Starting logkitty
# [20:59:22] I | ReactNativeJS ▶︎ Loaded DevTools @ http://localhost:8097/
# [20:59:22] I | ReactNativeJS ▶︎ Running "rnprojectdemo" with {"rootTag":111,"initialProps":{},"fabric":true}
# ...